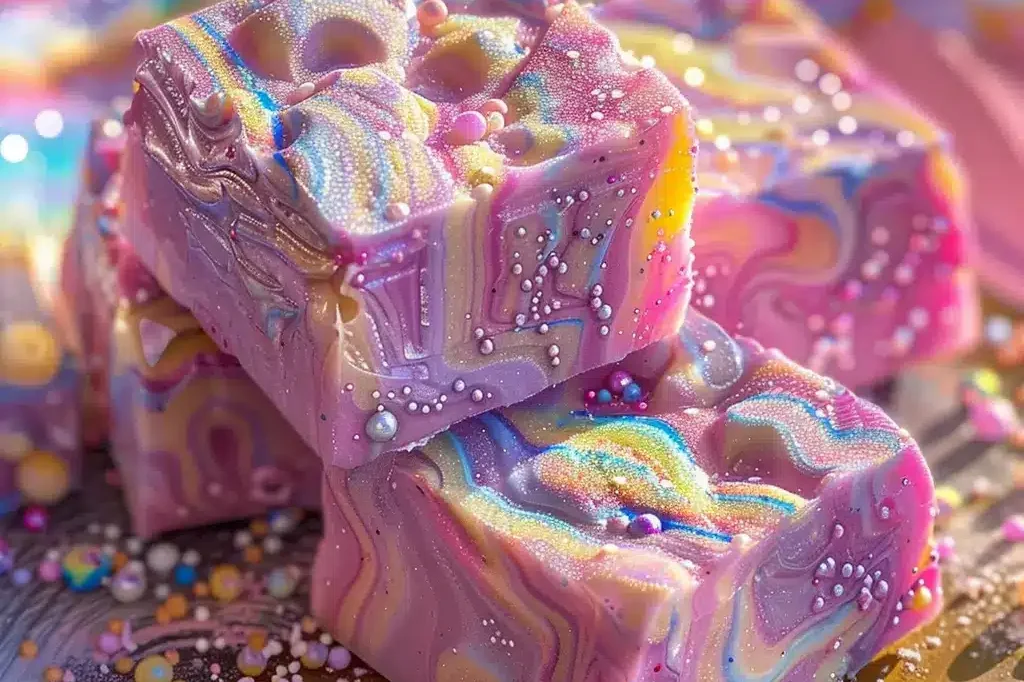
Have you ever wanted to taste a piece of the ocean’s magic? Imagine sinking your teeth into a colourful, creamy treat that transports you to an underwater kingdom where mermaids share their sweetest secrets. Well, welcome to the enchanting world of Mermaid Candy Fudge! This delightful confection is not just a feast for the eyes but a carnival for your taste buds. Let’s embark on a journey to discover how you can create this whimsical dessert in your own kitchen.
History of the Recipe
You might wonder, how did Mermaid Candy Fudge come to be? Let’s dive into its origins. While the recipe itself is a modern creation, its inspiration comes from a long history of colorful sweets and fantasy-themed treats.
The roots of fudge trace back to late 19th-century America. Legend has it that fudge was the happy accident of a botched caramel batch. Over time, this creamy, sugary delight became a staple in American confectionery. Fast forward to the 21st century, the internet exploded with unicorns, mermaids, and all things fantastical, sparking a new trend in themed desserts. That’s when creative bakers decided to blend the traditional fudge recipe with the vibrant, iridescent hues inspired by mermaid tales.
Mermaid Candy Fudge emerged as a celebration of imagination and indulgence. This recipe captures the essence of underwater fantasy through its pastel swirls and shimmering sprinkles. It’s a perfect example of how food can be transformed into a work of art, evoking both nostalgia and wonder. So, while mermaids may be mythical, this fudge is a very real, very delicious tribute to their enchanting world.
Most Important Ingredients
To make Mermaid Candy Fudge, you need a few key ingredients that make this recipe a standout. The base ingredients for any fudge are crucial, but what sets this one apart are the elements that bring the mermaid magic to life:
- White chocolate chips – The creamy foundation.
- Sweetened condensed milk – Gives the fudge its smooth, melt-in-your-mouth texture.
- Butter – Adds richness and depth.
- Food coloring – To create those mesmerizing swirls.
- Edible glitter and sprinkles – For that essential mermaid sparkle.
These ingredients are the backbone of the recipe, ensuring every bite is as enchanting as it looks.
All Ingredients to Make the Recipe
- 3 cups white chocolate chips
- 1 can (14 ounces) sweetened condensed milk
- ¼ cup unsalted butter
- Gel food coloring in blue, purple, and pink
- Edible glitter
- Assorted sprinkles (stars, pearls, etc.)
- 1 teaspoon vanilla extract
- Pinch of salt
Instructions
- Prepare your pan: Line an 8×8 inch pan with parchment paper.
- Melt the base: In a saucepan, combine white chocolate chips, sweetened condensed milk, and butter. Stir continuously over low heat until fully melted and smooth.
- Add flavor: Mix in the vanilla extract and salt.
- Divide and color: Separate the mixture into three bowls. Add a few drops of different food coloring to each bowl (blue, purple, pink) and stir until you achieve your desired shades.
- Create the swirls: Drop spoonfuls of each color into the prepared pan, alternating colors. Use a knife or toothpick to swirl the colors together, creating a marbled effect.
- Add the magic: Sprinkle the top with edible glitter and assorted sprinkles.
- Set and chill: Refrigerate the fudge for at least 2 hours, or until firm.
- Cut and enjoy: Once set, lift the fudge out of the pan using the parchment paper. Cut into squares and serve.
Notes
- Make sure not to overheat the chocolate mixture to avoid a grainy texture.
- Use gel food coloring to prevent adding extra liquid to the fudge.
- Store in an airtight container to maintain freshness.
Serving and Storage Tips
When it comes to serving your Mermaid Candy Fudge, presentation is key. Arrange the pieces on a platter, garnished with extra sprinkles or glitter for added flair. This treat is perfect for parties, special occasions, or just a fun family night.
For storage, keep the fudge in an airtight container in the refrigerator. This helps maintain its texture and freshness. It can last up to two weeks, but we doubt it will stick around that long once everyone gets a taste!
Variations
Want to put your spin on Mermaid Candy Fudge? Here are some fun variations:
- Flavor Twist: Add different extracts like coconut or almond to give a unique flavor profile.
- Mix-Ins: Incorporate crushed cookies, nuts, or marshmallows for extra texture.
- Color Play: Use different colors to match various themes – think unicorns or galaxy fudge.
What is the Best Thing About This Recipe?
The best part about Mermaid Candy Fudge is its versatility and visual appeal. This recipe is incredibly forgiving and allows for so much creativity. Whether you’re making it for a birthday party, a baby shower, or just a treat for yourself, the vibrant colors and whimsical decorations are sure to delight.
Additionally, the ease of the recipe means it’s accessible for everyone, from baking novices to seasoned pros. It’s a fantastic way to get kids involved in the kitchen, sparking their imagination and teaching them basic cooking skills.
Lastly, the taste is undeniably delicious. The combination of creamy white chocolate, rich butter, and sweetened condensed milk creates a texture and flavor that is simply irresistible. Each bite is like a sweet dive into an underwater adventure, making it more than just a dessert – it’s an experience.
Storing Tips
To ensure your Mermaid Candy Fudge stays as magical as the day you made it, proper storage is essential. Keep it in an airtight container in the refrigerator. This will help maintain its firm texture and prevent any unwanted moisture from seeping in.
If you need to store it for an extended period, consider freezing. Wrap the fudge pieces individually in plastic wrap, then place them in a freezer-safe bag. They can be stored for up to three months. When ready to enjoy, simply thaw in the refrigerator overnight.
FAQs
1. Can I use regular chocolate instead of white chocolate?
Yes, but the colors won’t be as vibrant since dark chocolate will alter the hues.
2. Can I make this fudge without a stove?
You can melt the ingredients in a microwave-safe bowl in 30-second intervals, stirring in between until smooth.
3. What if I don’t have gel food coloring?
Liquid food coloring can be used, but use sparingly to avoid altering the texture.
4. Can I make this recipe dairy-free?
Yes, use dairy-free white chocolate chips and condensed milk alternatives.
5. How long does it take to make?
Preparation takes about 20 minutes, plus 2 hours for chilling.
Do’s and Don’ts
Do’s
- Do use high-quality ingredients: The better the chocolate, the better the fudge.
- Do be patient with the melting process: Slow and steady wins the race.
- Do get creative: Have fun with colors and decorations.
Don’ts
- Don’t overheat the chocolate: It can seize and ruin the texture.
- Don’t skimp on the sprinkles: This is all about the visual magic.
- Don’t rush the chilling process: Give it time to set properly.
Conclusion
Mermaid Candy Fudge is more than just a treat; it’s a journey into a magical world where creativity knows no bounds. With its vibrant colors, delightful textures, and rich flavors, it’s sure to be a hit with kids and adults alike. Whether you’re an experienced baker or just starting, this recipe is a perfect way to bring a little magic into your kitchen. So why wait? Dive in and create your own Mermaid Candy Fudge today – your taste buds will thank you!
Print
Mermaid Candy Fudge: Dive into a Delicious Dream
- Total Time: 30 minutes
- Yield: 16 squares 1x
Ingredients
- 3 cups white chocolate chips
- 1 can (14 ounces) sweetened condensed milk
- ¼ cup unsalted butter
- Gel food coloring in blue, purple, and pink
- Edible glitter
- Assorted sprinkles (stars, pearls, etc.)
- 1 teaspoon vanilla extract
- Pinch of salt
Instructions
- Prepare your pan: Line an 8×8 inch pan with parchment paper.
- Melt the base: In a saucepan, combine white chocolate chips, sweetened condensed milk, and butter. Stir continuously over low heat until fully melted and smooth.
- Add flavor: Mix in the vanilla extract and salt.
- Divide and color: Separate the mixture into three bowls. Add a few drops of different food coloring to each bowl (blue, purple, pink) and stir until you achieve your desired shades.
- Create the swirls: Drop spoonfuls of each color into the prepared pan, alternating colors. Use a knife or toothpick to swirl the colors together, creating a marbled effect.
- Add the magic: Sprinkle the top with edible glitter and assorted sprinkles.
- Set and chill: Refrigerate the fudge for at least 2 hours, or until firm.
- Cut and enjoy: Once set, lift the fudge out of the pan using the parchment paper. Cut into squares and serve.
Notes
- Avoid overheating the chocolate mixture to prevent a grainy texture.
- Use gel food coloring to maintain the fudge’s consistency.
- Store in an airtight container to keep it fresh.
- Prep Time: 20 minutes
- Cook Time: 10 minutes