Have you ever walked past a bakery early in the morning and been completely captivated by the intoxicating aroma of freshly baked doughnuts? It’s like a warm hug for your senses. Now, imagine infusing that sensory hug with the tropical allure of toasted coconut. Intrigued? Let’s dive into the delightful world of Toasted Coconut Doughnuts.
A Brief Doughnut History
The Journey of Doughnuts: From Humble Beginnings to Gourmet Delights Doughnuts, or donuts (because let’s keep it simple, shall we?), have traveled a long and sugary path to become the beloved treat they are today. Originating from the Dutch settlers in the 19th century, these “oily cakes” have evolved into a canvas for culinary artistry.
The Coconut Craze
Why Coconut? The Rise of a Tropical Superstar Coconut has taken the culinary world by storm, transforming from a tropical novelty to a pantry staple. Its versatility and health benefits have catapulted it into the spotlight, making it a perfect candidate for our doughnut experiment.
The Recipe: Crafting the Perfect Toasted Coconut Doughnut
Ingredients and Magic: The Anatomy of a Toasted Coconut Doughnut Creating the perfect Toasted Coconut Doughnut is akin to conducting a symphony. Each ingredient and step is crucial, from the dough’s soft embrace to the toasted coconut’s crunchy serenade.
The Dough: The Foundation
- Flour Power: Choosing the right flour is crucial. All-purpose or pastry?
- Sugar, Spice, and Everything Nice: The sweet balance.
- Yeast or No Yeast? The leavening debate.
The Toasted Coconut: The Star
- Toasting Techniques: Oven vs. skillet – a flavorful dilemma.
- The Coating Conundrum: Ensuring every doughnut is evenly dressed in coconut bliss.
The Glaze: The Finishing Touch
- Crafting the Perfect Glaze: A sweet embrace that holds everything together.
- The Drizzle Dance: Techniques for a picture-perfect finish.
The Cooking Process: A Step-by-Step Guide
From Mixing to Munching: The Art of Doughnut Making Making Toasted Coconut Doughnuts is not just baking; it’s an art form. Here’s a simplified walkthrough to transform you into a doughnut wizard.
- Mixing Mastery: Combining ingredients with love.
- The Rise of the Dough: Patience is key.
- Shaping the Future: Crafting the perfect circles of joy.
- The Frying Pan Saga: Golden brown perfection.
- The Toasting Triumph: Coconut’s moment of glory.
- Glazing Glory: The final, sweet touch.
Healthier Alternatives: Enjoy Without Guilt
Making Doughnuts Healthier: Is It Possible? Yes! And you don’t have to sacrifice flavor. Let’s explore options like baking instead of frying, using alternative flours, and incorporating natural sweeteners.
Baking vs. Frying: A Healthy Debate
Alternative Flours: Beyond All-Purpose
Sweeteners: The Natural Way
Pairing and Serving Suggestions
Beyond Coffee: Elevating Your Doughnut Experience Toasted Coconut Doughnuts are versatile. Pair them with tropical fruit salads, aromatic teas, or even a bold espresso to elevate your indulgence.
The Nutritional Aspect
Balancing Indulgence and Wellness While doughnuts are traditionally seen as a guilty pleasure, incorporating coconut adds a layer of nutritional benefits. Let’s break down the health perks without overshadowing the treat’s decadent nature.
FQA: Toasted Coconut Doughnuts
Q1: Can I use instant yeast instead of active dry yeast for the doughnuts? A1: Yes, you can use instant yeast as a substitute for active dry yeast. The main difference is that instant yeast doesn’t need to be dissolved in water before adding it to your dry ingredients. Use the same amount specified for active dry yeast.
Q2: My doughnuts didn’t rise well. What might have gone wrong? A2: There are a few potential reasons: the yeast might have been old or expired, the liquid used might have been too hot and killed the yeast, or the dough might not have been kept in a warm enough environment to rise properly. Ensure your yeast is fresh, the liquid temperature is around 110°F, and the rising environment is warm and draft-free.
Q3: Can these doughnuts be baked instead of fried for a healthier option? A3: Absolutely! To bake, preheat your oven to 375°F (190°C). Place the shaped and risen doughnuts on a baking sheet lined with parchment paper. Bake for 10-12 minutes or until they are lightly golden. Keep in mind, the texture and taste will differ slightly from fried doughnuts.
Q4: How can I make a dairy-free version of these doughnuts? A4: For a dairy-free version, substitute the milk with a plant-based milk (almond, soy, coconut milk) and use a dairy-free butter alternative. Check the ingredients of your other components to ensure they meet your dietary needs.
Q5: What’s the best way to store leftover doughnuts to keep them fresh? A5: Store leftover doughnuts in an airtight container at room temperature for up to 2 days. If they’re filled or glazed, it’s best to refrigerate them. Keep in mind, doughnuts are best enjoyed the day they are made.
DIY Doughnut Crafting: Tips and Tricks
Diving into the world of DIY doughnut crafting is not just about following recipes; it’s about embracing creativity, understanding the nuances of baking, and enjoying the process as much as the final product. Here are some essential tips and tricks to help you elevate your homemade doughnut game to new heights:
1. Understand Your Yeast
Yeast is a crucial component in many doughnut recipes, especially those that are yeast-raised rather than cake-style. Knowing the difference between active dry yeast and instant yeast can impact your dough’s rise and texture. Instant yeast can be mixed directly with dry ingredients, while active dry yeast should be dissolved in warm water first.
2. Temperature Control is Key
When working with yeast, temperature is your best friend or your worst enemy. Too hot, and you’ll kill the yeast; too cold, and it won’t activate. Aim for lukewarm temperatures (around 105°F-115°F) when dissolving your yeast. Similarly, when frying, keeping your oil consistently between 350°F and 375°F ensures your doughnuts cook through without becoming greasy.
3. Don’t Overwork the Dough
Mix your dough just until the ingredients are combined. Overworking doughnut dough can lead to tough, chewy doughnuts rather than light and fluffy ones. This is because overmixing develops the gluten in the flour. A gentle touch will yield the best texture.
4. Proofing Patience
Proofing, or allowing your dough to rise, is critical for developing the right texture and flavor in yeast-raised doughnuts. Find a warm, draft-free spot to let your doughnuts rise. They should nearly double in size; this process can’t be rushed, so patience is vital.
5. Experiment with Flavors and Fillings
Once you’ve mastered the basic doughnut, the fun really begins. Experiment with different flavors, fillings, and toppings. From classic sugar and cinnamon coatings to more adventurous filled doughnuts with homemade jams, custards, or chocolate hazelnut spreads, the possibilities are endless.
6. Frying vs. Baking
While traditional doughnuts are fried, baking is a healthier alternative that still yields delicious results. If you choose to fry, use a deep, heavy pot and a candy or frying thermometer to monitor the oil temperature. If baking, make sure your doughnut pans are well-greased to avoid sticking.
7. The Perfect Glaze
A good glaze can elevate a simple doughnut to something special. For a basic glaze, mix powdered sugar with a little milk or water until you achieve a thick but pourable consistency. Don’t forget to add a dash of vanilla extract for extra flavor. For chocolate lovers, cocoa powder or melted chocolate can be mixed into the glaze.
8. Presentation Matters
The appearance of your doughnuts can make them even more appealing. Use a piping bag to fill doughnuts evenly, and dip them in glaze rather than pouring it over for a smooth finish. Sprinkles, toasted coconut, chopped nuts, or even edible flowers can add a touch of elegance.
9. Storage Solutions
If you somehow resist eating all your doughnuts in one go, proper storage is key to keeping them fresh. Unfilled doughnuts can be stored at room temperature for a couple of days in an airtight container. For filled doughnuts, refrigerate them, especially if the filling is cream-based.
10. Practice Makes Perfect
The most important tip is to keep practicing. Each batch of doughnuts is an opportunity to refine your technique, tweak flavors, and perfect your presentation. Don’t be afraid to fail; it’s all part of the learning process.
Conclusion: The Sweet Journey
By following these tips and tricks, you’re well on your way to becoming a doughnut crafting aficionado. Remember, the goal is to have fun and enjoy the delicious results of your efforts. Happy baking (or frying)!
Print
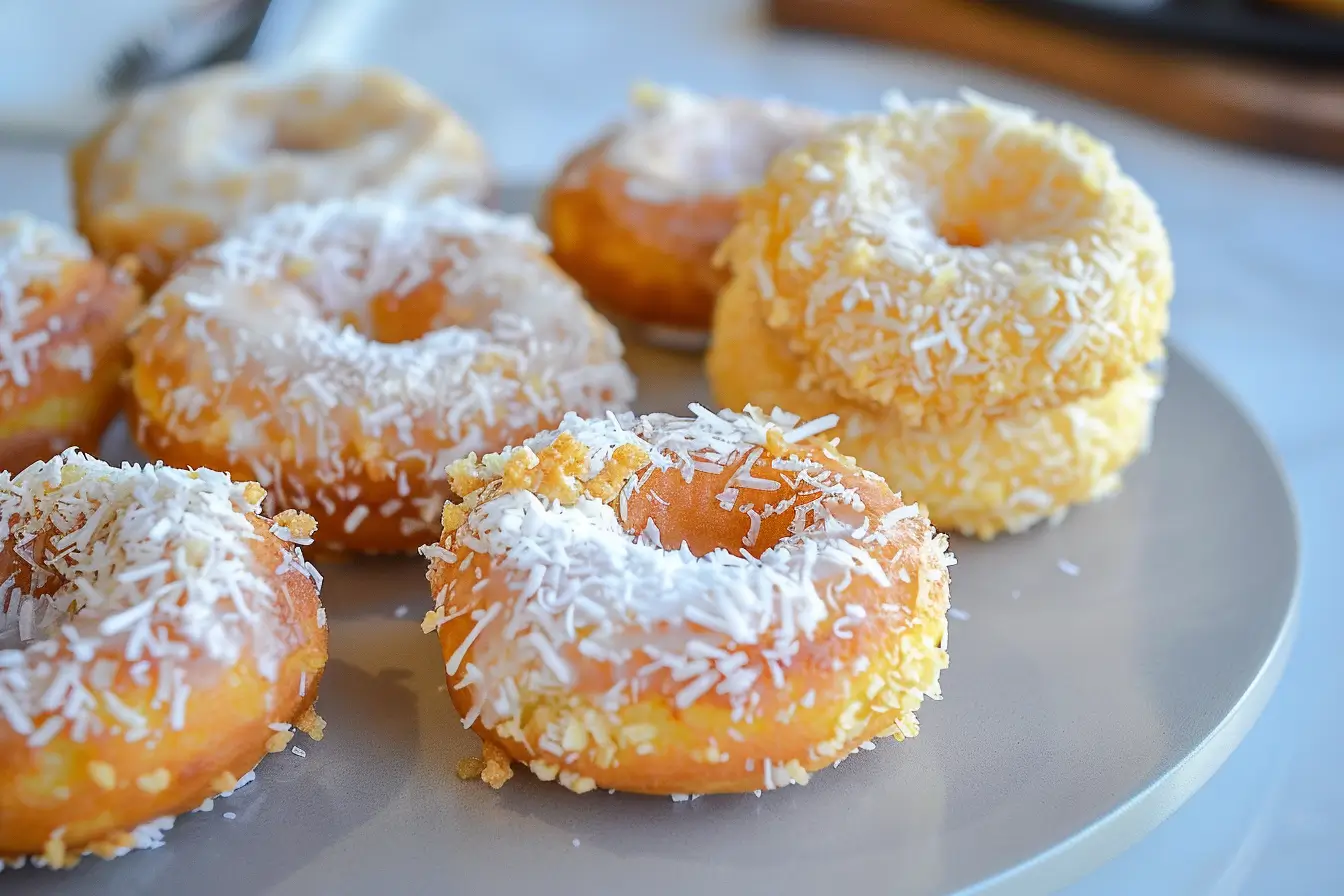
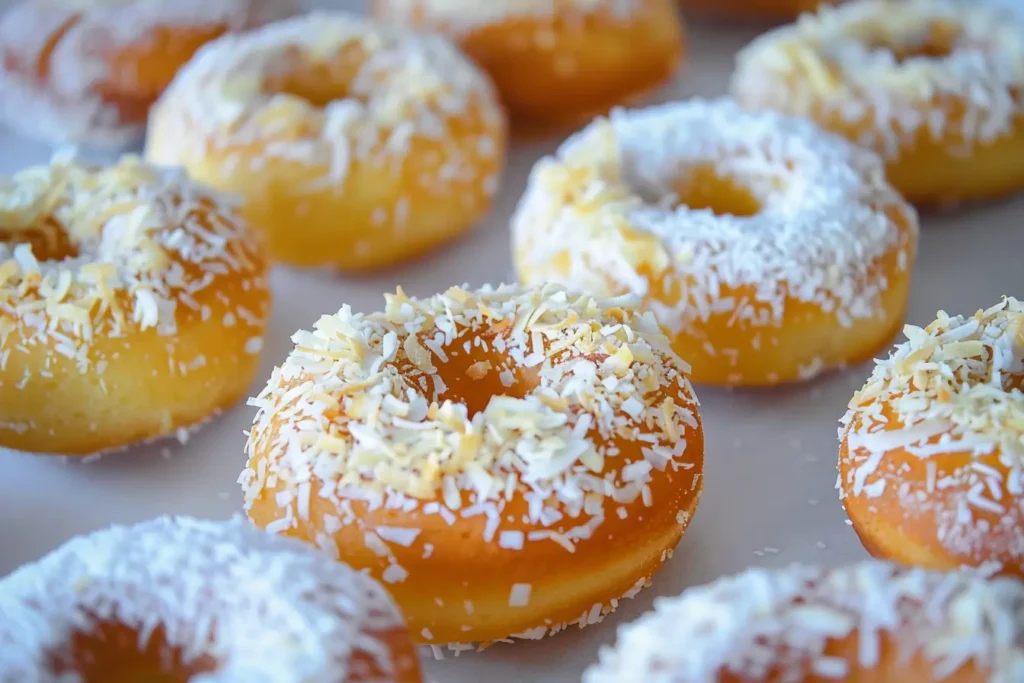
Toasted coconut doughnuts recipe
- Total Time: 1 hour 50 minutes
- Yield: 12 doughnuts 1x
Ingredients
- For the Doughnuts:
- 1 cup warm milk (about 110°F)
- 2 ¼ teaspoons (1 packet) active dry yeast
- 2 large eggs, room temperature
- ½ cup granulated sugar
- ½ teaspoon salt
- 4 cups all-purpose flour, plus more for dusting
- 6 tablespoons unsalted butter, softened
- For the Toasting Coconut:
- 1 cup shredded coconut
- For the Glaze:
- 2 cups powdered sugar
- 3–4 tablespoons milk or coconut milk
- ½ teaspoon vanilla extract
Instructions
- Prepare the Dough:
- In a large mixing bowl, combine the warm milk and yeast. Let it sit until frothy, about 5 minutes.
- Add the eggs, sugar, salt, and half of the flour. Mix until smooth.
- Gradually add the remaining flour and butter. Mix until a soft dough forms.
- Knead on a floured surface until smooth and elastic, about 5 minutes.
- Place the dough in a greased bowl, cover, and let rise in a warm place until doubled in size, about 1 hour.
- Shape and Fry the Doughnuts:
- Roll out the dough on a floured surface to ½ inch thickness. Cut out doughnuts with a doughnut cutter.
- Cover the shaped doughnuts and let them rise again until puffy, about 30 minutes.
- Heat oil in a deep fryer or large pot to 350°F. Fry the doughnuts in batches until golden brown, about 1 minute per side.
- Transfer to a wire rack to cool slightly.
- Toast the Coconut:
- Spread the shredded coconut on a baking sheet. Toast in a preheated oven at 350°F until golden brown, about 5-7 minutes, stirring occasionally.
- Prepare the Glaze:
- In a bowl, mix together powdered sugar, milk (or coconut milk), and vanilla extract until smooth.
- Assemble the Doughnuts:
- Dip each warm doughnut into the glaze, then into the toasted coconut, pressing gently to adhere.
- Place back on the wire rack to set.
Notes
- Yeast Activation: Ensure your milk is warm but not hot to touch to properly activate the yeast without killing it.
- Frying Tips: Maintain the oil temperature to avoid soggy or overly browned doughnuts.
- Storage: Best enjoyed the day they are made but can be stored in an airtight container for up to 2 days.
- Prep Time: 1 hour 30 minutes
- Cook Time: 20 minutes
- Category: Dessert
- Method: Frying
- Cuisine: American
Nutrition
- Serving Size: 1 doughnut
- Calories: 300 (approx.)
- Sugar: 15g
- Fat: 10g
- Carbohydrates: 45g
- Fiber: 1g
- Protein: 5g
- Cholesterol: 55mg