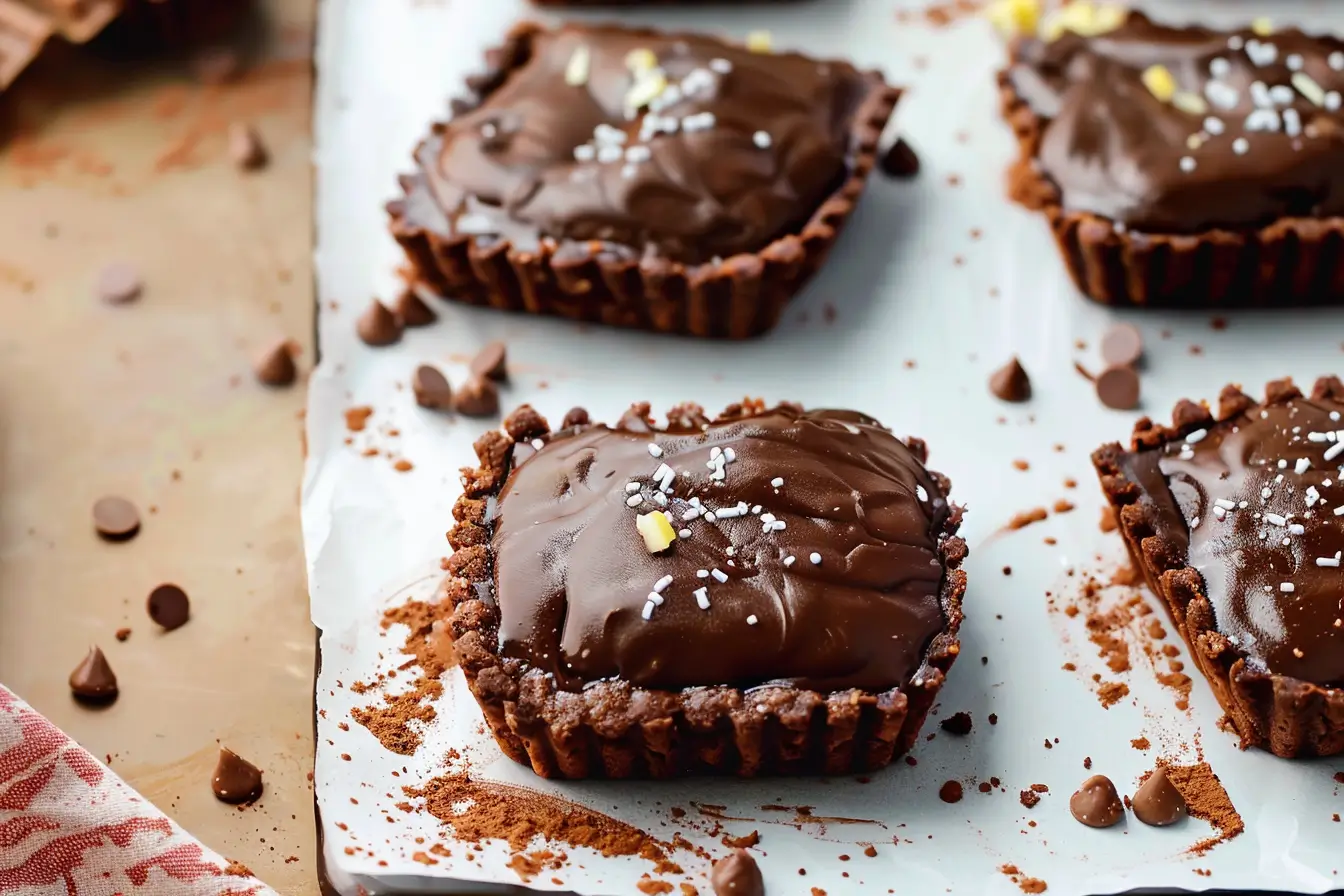
Who doesn’t love a bit of sweetness in their life? And when that sweetness comes in the form of fudge chocolate pastry tarts, well, it’s hard to resist! Imagine biting into a flaky, buttery pastry filled with smooth, rich chocolate fudge. Sounds like a dream, right? Today, we’re not just dreaming; we’re diving headfirst into the delicious world of fudge chocolate pastry tarts. So, grab your apron, and let’s get baking!
The Magic Behind The Pastry
Understanding Pastry Basics
Before we get to the chocolatey center of our tart, let’s talk pastry. Making pastry might seem like a form of culinary witchcraft, but it’s actually pretty straightforward. The secret? Keeping everything cold. This ensures your tart base is as flaky as a winter morning.
Choosing the Right Flour
Not all flours are created equal. For pastry, you want a low-protein flour. Why? It’s all about the gluten. Less protein means less gluten development, and that means a tender pastry that melts in your mouth.
The Heart of the Matter: Fudge Filling
The Perfect Fudge Consistency
The heart and soul of our tart is, undoubtedly, the fudge. Achieving that perfect balance between firm and gooey can seem like a tightrope walk over a chocolate river. The key? Precision in your ingredients and timing.
Quality Chocolate is Key
When it comes to fudge, quality matters. Opt for a high-quality chocolate with a high cocoa content. This isn’t just about snobbery; it’s about flavor. Good chocolate means a richer, deeper taste that’ll make your tarts unforgettable.
Assembling the Masterpiece
Bringing It All Together
Now that you’ve got your flaky pastry and your rich fudge ready, it’s time to assemble your tart. This is where the magic happens, where two separate elements come together to create something truly special.
A Touch of Salt
Here’s a little secret: sprinkle a pinch of sea salt over the fudge before you add the top layer of pastry. Why? Salt enhances the chocolate’s complexity, adding depth to its sweetness. Trust me, it’s a game-changer.
The Baking Process: Patience and Precision
Timing Is Everything
Baking is both an art and a science. The right temperature and timing are crucial for achieving that perfect tart. Too long in the oven, and you risk a dry filling; too short, and your pastry won’t have that desired flakiness.
The Importance of Preheating
Never underestimate the importance of preheating your oven. A consistent temperature is key to ensuring your tart bakes evenly. It might seem like a small step, but it makes all the difference.
Serving and Enjoyment: The Final Touch
Presentation Matters
You eat with your eyes first, so take a moment to make your tarts look as good as they taste. A dusting of powdered sugar, a drizzle of chocolate sauce, or even a sprig of mint can turn a simple tart into a work of art.
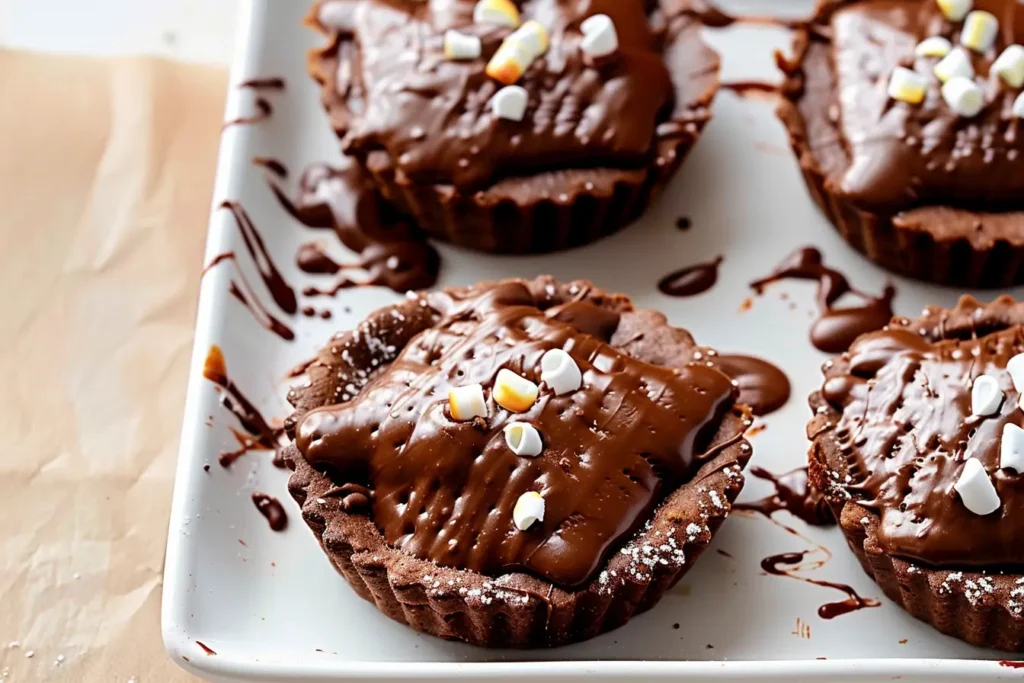
Creative Presentation Ideas
Art on a Plate
When it comes to presentation, think of your plate as a canvas. Use sauces, edible flowers, or fruit garnishes to add color and intrigue to your dessert, making it a feast for the eyes as well as the palate.
Serving Styles
Consider serving your tarts in unique ways. Miniature tarts can be a cute, individual serving option, while a larger tart can be a show-stopping centerpiece. The way you serve can enhance the overall enjoyment of your creation.
The Social Aspect of Baking
Baking as a Bonding Activity
Baking isn’t just a solitary pursuit; it can be a wonderful way to connect with others. Invite friends or family to bake with you, or start a baking club. Sharing in the creation process can be as rewarding as sharing in the consumption.
The Gift of Baking
Homemade baked goods are a thoughtful and personal gift. A beautifully wrapped tart can convey affection, appreciation, or celebration. It’s a simple way to spread joy and sweetness to the people in your life.
Pairing with the Perfect Beverage
What’s the perfect accompaniment to your fudge chocolate pastry tart? A glass of red wine, a cup of strong coffee, or even a cold glass of milk can enhance the flavors and turn your dessert into a memorable experience.
The Joy of Sharing
Spread the Love
Desserts like these are meant to be shared. Whether it’s a family dinner, a special occasion, or just a way to brighten someone’s day, fudge chocolate pastry tarts are a gesture of love. So, don’t hesitate to spread the sweetness!
Mastering the Technique
Perfecting Your Pastry Skills
Making pastry is as much about technique as it is about ingredients. Learning to handle the dough gently to avoid overworking it is crucial. Remember, the less you touch it, the flakier it will be.
The Chill Factor
Chilling your dough before rolling it out can make a world of difference. This step solidifies the fat, making the dough easier to handle and helping to maintain its shape during baking.
The Role of Temperature and Time
Finding the Sweet Spot
Temperature and time are the unsung heroes of baking. Each degree and minute can dramatically alter the outcome. For your tarts, use an oven thermometer to ensure accuracy, and don’t be afraid to adjust baking times based on your oven’s unique temperament.
Cooling Down
Patience is a virtue, especially in baking. Allow your tarts to cool completely before slicing. This waiting period isn’t just a test of willpower; it gives the filling time to set, ensuring that each slice is perfect.
Frequently Asked Questions (FAQs)
Q: Can I use store-bought pastry dough for my tarts?
A: Absolutely! While making your pastry can be rewarding, store-bought dough is a fantastic time-saver and can yield delicious results. Just be sure to choose a high-quality product for the best flavor and texture.
Q: How do I prevent my pastry from shrinking during baking?
A: Shrinking pastry is often the result of gluten development. To prevent this, avoid overworking the dough and ensure it’s well-chilled before baking. Additionally, you can blind bake your crust with pie weights to help maintain its shape.
Q: Can I make my tarts ahead of time?
A: Yes, you can prepare your tarts ahead of time. Baked tarts can be stored in an airtight container and refrigerated for a few days. For longer storage, consider freezing them. Just be sure to thaw them properly before serving.
Q: How do I know when my tart is perfectly baked?
A: Your tart is done when the pastry is golden and flaky, and the filling has set but is still slightly wobbly in the center. It’s always better to err on the side of underbaking rather than overbaking, as the filling will continue to set as it cools.
Q: Can I make my fudge filling less sweet?
A: Definitely. If you prefer a less sweet filling, consider using a darker chocolate with a higher cocoa percentage, or reduce the sugar in the recipe slightly. You can also add a pinch of salt to balance the sweetness.
Do’s and Don’ts
Do’s:
- Do experiment with different flavors and fillings. The versatility of tarts means you can tailor them to your taste preferences or whatever ingredients you have on hand.
- Do use high-quality ingredients. The simplicity of tarts means that the quality of each ingredient shines through, so opt for the best you can afford.
- Do chill your pastry dough. This prevents the fat from melting too quickly, ensuring a flakier, more delicious crust.
- Do bake with precision. Follow recipe timings and temperatures closely, but also use your judgment and knowledge of your oven to make adjustments as needed.
- Do share your creations. Baking is a joyful act of love and sharing, so don’t hesitate to spread the sweetness with friends and family.
Don’ts:
- Don’t rush the baking process. Good things take time, and that’s especially true for baking. Rushing can lead to underdeveloped flavors and textures.
- Don’t be afraid of mistakes. Every baker, no matter how experienced, makes mistakes. View them as learning opportunities and don’t get discouraged.
- Don’t skimp on the chill time for the dough. It might be tempting to skip chilling to save time, but this step is crucial for the texture and flavor of your tart.
- Don’t forget to preheat your oven. A properly preheated oven is key to even baking and the perfect finish.
- Don’t overlook presentation. The visual appeal of your tarts is almost as important as their taste. A little effort in presentation can turn a simple tart into a showstopper.
With these FAQs and Do’s and Don’ts in mind, you’re well on your way to becoming a master tart baker. Remember, baking is as much about the journey as it is about the destination. So enjoy the process, learn from your experiences, and savor every delicious bite.
Tips and Tricks for the Perfect Tart
From Novice to Expert
Even the most experienced bakers started as beginners. Here are a few tips and tricks to help you on your journey:
- Keep your ingredients cold.
- Invest in quality chocolate.
- Don’t rush the baking process.
- Remember, practice makes perfect.
Conclusion: Embracing the Sweetness
Fudge chocolate pastry tarts are more than just a dessert. They’re a celebration of flavor, a testament to the joy of baking, and a reminder of the sweetness in our lives. So, embrace the process, enjoy the results, and always remember: the best part of baking is the love you put into it.
Print
Fudge Chocolate Pastry Tarts
- Total Time: 2 hours (includes chilling time)
- Yield: 1 9-inch tart 1x
Ingredients
- For the Pastry:
- 1 1/4 cups all-purpose flour, plus extra for dusting
- 1/4 tsp salt
- 1/2 cup (1 stick) unsalted butter, cold and cubed
- 2–4 tbsp ice water
- For the Fudge Filling:
- 1 cup heavy cream
- 12 oz semisweet chocolate, chopped
- 1/2 cup granulated sugar
- 1/4 tsp sea salt
- 1 tsp vanilla extract
Instructions
- Prepare the Pastry Dough:
- In a large bowl, whisk together flour and salt. Add the cubed butter and use a pastry blender to cut the butter into the flour until the mixture resembles coarse crumbs.
- Gradually add ice water, 1 tablespoon at a time, mixing until the dough comes together. Form into a disk, wrap in plastic wrap, and chill for at least 1 hour.
- Roll Out the Dough:
- On a lightly floured surface, roll out the dough to a 1/8-inch thickness. Press into a 9-inch tart pan, trimming any excess. Prick the bottom with a fork, and chill for 30 minutes.
- Bake the Tart Shell:
- Preheat oven to 375°F (190°C). Line the tart shell with parchment paper, fill with pie weights, and bake for 20 minutes. Remove the weights and parchment, and bake for another 10 minutes until golden. Let cool.
- Make the Fudge Filling:
- In a medium saucepan, heat the cream until it just begins to simmer. Remove from heat and stir in the chocolate until melted and smooth. Add sugar, sea salt, and vanilla, stirring until well combined.
- Assemble and Chill:
- Pour the fudge filling into the cooled tart shell. Chill in the refrigerator for at least 2 hours, or until set.
- Serve:
- Serve chilled. Optional: garnish with whipped cream, fresh berries, or a dusting of powdered sugar.
Notes
- For a gluten-free tart, substitute the all-purpose flour with a gluten-free flour blend designed for baking.
- The tart can be stored in the refrigerator for up to 3 days.
- Prep Time: 1 hour 30 minutes
- Cook Time: 30 minutes
- Category: Dessert
- Method: Baking
- Cuisine: American
Nutrition
- Serving Size: 1 slice (1/8 of tart)
- Calories: N/A
- Sugar: N/A
- Fat: N/A
- Carbohydrates: N/A
- Protein: N/A
- Cholesterol: N/A