Hey there, fellow sweet tooth! You’ve stumbled upon the ultimate guide to creating the most delectable, mouth-watering baked chocolate donuts you’ve ever sunk your teeth into. Forget about those run-of-the-mill desserts; we’re about to embark on a journey that will transform your kitchen into the hottest donut shop in town.
What’s the Big Deal About Baked Donuts?
First off, let’s tackle the elephant in the room: why bake when you can fry? Baking, my friends, is the secret to enjoying that rich, chocolatey goodness without the guilt of extra calories. Plus, it’s a tad bit cleaner than dealing with a vat of hot oil, don’t you think?
The Magic of Chocolate in Baking
Chocolate isn’t just a flavor; it’s an experience. It’s like that cozy, warm hug on a bad day or the high-five you give yourself for adulting successfully. When it comes to baked chocolate donuts, the type of chocolate you use can make or break your creation. But fear not! We’ll guide you through the maze of cocoa powders and chocolate chips.
Let’s Talk Ingredients
Crafting the perfect baked chocolate donut is akin to orchestrating a symphony. Each ingredient plays a crucial role in creating that harmonious blend of flavors and textures.
The Flour Power
All-purpose or whole wheat? That’s the question. While all-purpose flour gives you that classic texture, whole wheat can add a nutty depth. Why not experiment and find your sweet spot?
Sweeten the Deal
Sugar, sugar, and more sugar? Not necessarily. From traditional granulated to the more adventurous coconut sugar, the world of sweeteners is vast and varied. Let’s find the perfect balance that whispers sweet nothings to your palate.
Leavening Love
The unsung heroes of the donut world, baking powder, and soda, give your treats that light, airy quality that makes them oh-so-irresistible. Let’s pay homage to these powerful powders.
The Art of Mixing
Creating the perfect batter is not unlike painting a masterpiece. It’s all about the technique.
Dry vs. Wet: The Ultimate Battle
Mixing your dry ingredients separately from your wet ones might seem like an extra step, but trust me, it’s the secret to a uniform texture. No one wants a lumpy donut!
The Whisk Way
Overmixing is the nemesis of the tender donut. Gentle folds are your best friends here, ensuring your batter is just right.
To Mold or Not to Mold
Ah, the great donut pan debate. Silicone or metal? While both have their merits, finding the one that complements your baking style is key. Let’s dive into the pros and cons.
Grease Lightning
The last thing you want is your beautiful creations sticking to the pan. A little grease goes a long way, but what’s the best type? Butter, oil, or perhaps a spray? Let’s figure it out together.
The Baking Saga
Now, we’re getting to the heart of the matter: the baking process itself.
Temperature Trials
Just like Goldilocks, we’re in search of that ‘just right’ temperature. Too hot, and your donuts might burn; too cold, and they’re doughy. Let’s find the sweet spot.
Timing is Everything
Keep your eye on the clock! Baking times can vary, and the difference between underdone and overdone can be mere minutes.
A Glaze to Amaze
What’s a donut without a glaze? Whether you’re a purist who loves a simple sugar glaze or an adventurer ready to try a spicy chocolate sauce, we’ve got you covered.
The Thick and Thin of It
Consistency is key when it comes to glaze. Too runny? It’ll slide right off. Too thick? It’ll overwhelm your donut. Let’s strike the perfect balance.
Decoration Station
This is where the fun really begins. Sprinkles, nuts, or maybe some edible gold leaf if you’re feeling fancy? The sky’s the limit.
Keeping it Real (and Edible)
While we all love a donut that looks like a million bucks, let’s remember that taste is king. Edible decorations not only add pizzazz but can enhance the flavor profile.

FAQ
Can I use gluten-free flour for my chocolate donuts?
Yes, you can! Baking with gluten-free flour has come a long way, and there are many blends out there that can substitute one-to-one for all-purpose flour. Just keep an eye on the moisture level, as some gluten-free flours tend to absorb more liquid.
How do I ensure my donuts are moist and not dry?
The key to moist donuts lies in the balance of ingredients and not overbaking them. Using ingredients like buttermilk, yogurt, or applesauce can help keep your donuts moist. Also, make sure to check your donuts a couple of minutes before the baking time is up to avoid overbaking.
Can I add fillings to my chocolate donuts?
Absolutely, and it’s encouraged! Fillings can range from classic cream or jam to more inventive options like peanut butter or caramel. To add fillings, you can either pipe them into your donuts after baking or place a small amount of filling into your donut mold before adding the batter.
How long do baked chocolate donuts last?
When stored properly in an airtight container, baked chocolate donuts can last for up to 2 days at room temperature or up to a week in the refrigerator. However, they’re best enjoyed fresh!
Can I freeze baked chocolate donuts?
Yes, you can freeze baked chocolate donuts for up to 3 months. Make sure to wrap them individually in plastic wrap and then store them in a freezer bag or airtight container. Thaw them at room temperature or in the microwave when you’re ready to enjoy.
What’s the best way to melt chocolate for donut glaze?
Melting chocolate can be done either in a microwave or using a double boiler. If using a microwave, heat the chocolate in short bursts of 20-30 seconds, stirring in between, to avoid burning. For a double boiler, place the chocolate in a heatproof bowl over a pot of simmering water, making sure the water doesn’t touch the bottom of the bowl. Stir until smooth.
Can I make my baked donuts vegan?
Yes, making vegan baked chocolate donuts is quite straightforward. Substitute the dairy ingredients with their plant-based counterparts, such as almond milk for regular milk and flaxseed meal mixed with water for eggs. There are also many vegan alternatives for butter that work well in baking.
The Taste Test
Ah, the moment of truth. Taking that first bite is not just about savoring the flavor; it’s about celebrating the journey from ingredients to indulgence.
Share the Love
Donuts were made to be shared (even if it’s just bragging rights on social media). So, snap that pic, share that recipe, and spread the donut love.
Final Thoughts: The Donut Diaries
As we wrap up our donut odyssey, remember that baking is as much about the journey as it is about the destination. Each batch of donuts is a new adventure, a story to be told. So, preheat those ovens, tie on your aprons, and let the magic begin.
Embrace the Mistakes
Not every donut will be perfect, and that’s okay. Each misstep is a lesson learned, a step closer to donut perfection.
The End…or Just the Beginning?
As you gaze upon your freshly baked batch of chocolate donuts, remember, this isn’t the end. It’s just the beginning of your baking journey. So, here’s to the next batch, the next flavor exploration, and the next delicious mistake. Happy baking!
So, what are you waiting for? Let’s make some donuts!
Print
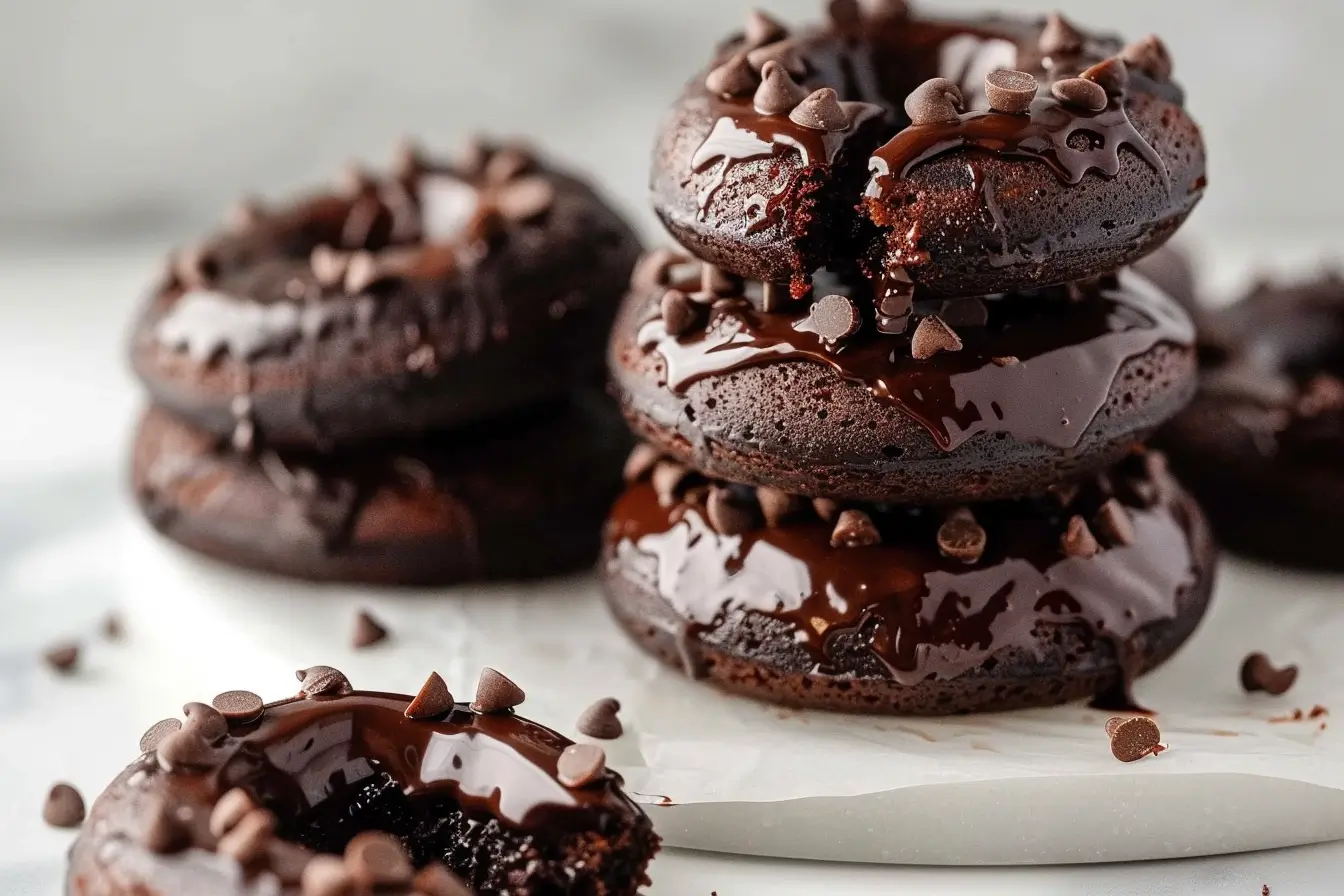
BAKED CHOCOLATE DONUTS
- Total Time: 25 minutes
- Yield: 12 donuts 1x
Ingredients
- 1 cup all-purpose flour
- 1/2 cup cocoa powder
- 1/2 cup granulated sugar
- 1 teaspoon baking powder
- 1/2 teaspoon baking soda
- 1/4 teaspoon salt
- 1/2 cup milk (any kind)
- 1/4 cup melted butter or oil
- 1 large egg
- 1 teaspoon vanilla extract
- 1/2 cup chocolate chips (optional)
- For the glaze:
- 1 cup powdered sugar
- 2 tablespoons cocoa powder
- 2–4 tablespoons milk or water
- Sprinkles for decoration (optional)
Instructions
- Preheat your oven to 350°F (175°C) and grease a donut pan.
- In a large bowl, whisk together the flour, cocoa powder, sugar, baking powder, baking soda, and salt.
- In another bowl, mix the milk, melted butter (or oil), egg, and vanilla extract.
- Pour the wet ingredients into the dry ingredients and mix until just combined. Fold in the chocolate chips, if using.
- Fill the donut cavities about 3/4 full. Bake for 12-15 minutes or until a toothpick inserted comes out clean.
- Let the donuts cool in the pan for a few minutes before transferring them to a wire rack to cool completely.
- For the glaze, whisk together the powdered sugar, cocoa powder, and milk (or water) until smooth. Adjust the consistency with more milk or powdered sugar if necessary.
- Dip each donut into the glaze and return to the wire rack. If desired, top with sprinkles. Allow the glaze to set before serving.
Notes
- Feel free to customize this recipe with different glazes or toppings. White chocolate, caramel, or even a simple sugar dusting could make delightful variations.
- These donuts are best enjoyed fresh but can be stored in an airtight container for up to 2 days.
- Prep Time: 10 minutes
- Cook Time: 15 minutes
- Method: Baking
- Cuisine: American
Nutrition
- Serving Size: 1 donut
- Calories: 200
- Sugar: 15g
- Sodium: 150mg
- Fat: 8g
- Carbohydrates: 30g
- Protein: 3g
- Cholesterol: 35mg